To set up LiteSpeed Cache, install the plugin from your WordPress dashboard, switch on a few core caching settings, and purge once — your pages start serving from cache in minutes. It does the most on LiteSpeed hosting, but the setup is the same wherever your site lives.
What LiteSpeed Cache does (and what it needs)
LiteSpeed Cache does two jobs. The big one is full-page caching: it saves a ready-made copy of each page so the server skips PHP and database work on the next visit. The catch is that server-level caching only runs on a LiteSpeed web server. If your host uses one — Hostinger does, and pre-installs the plugin — you get the full benefit. On Apache or Nginx the plugin still handles front-end optimization like minifying CSS and JS and lazy-loading images, but the heavy page-cache part needs LiteSpeed or its free QUIC.cloud service. If you’re shopping for a host, our fast WordPress hosting guides cover the LiteSpeed options.
How to set up LiteSpeed Cache (step by step)
Step 1 — Install and activate the plugin
In your dashboard go to Plugins → Add Plugin, search for “LiteSpeed Cache”, then click Install Now and Activate. It’s free, and it adds a LiteSpeed Cache menu to your sidebar.

Step 2 — Turn on the core cache settings
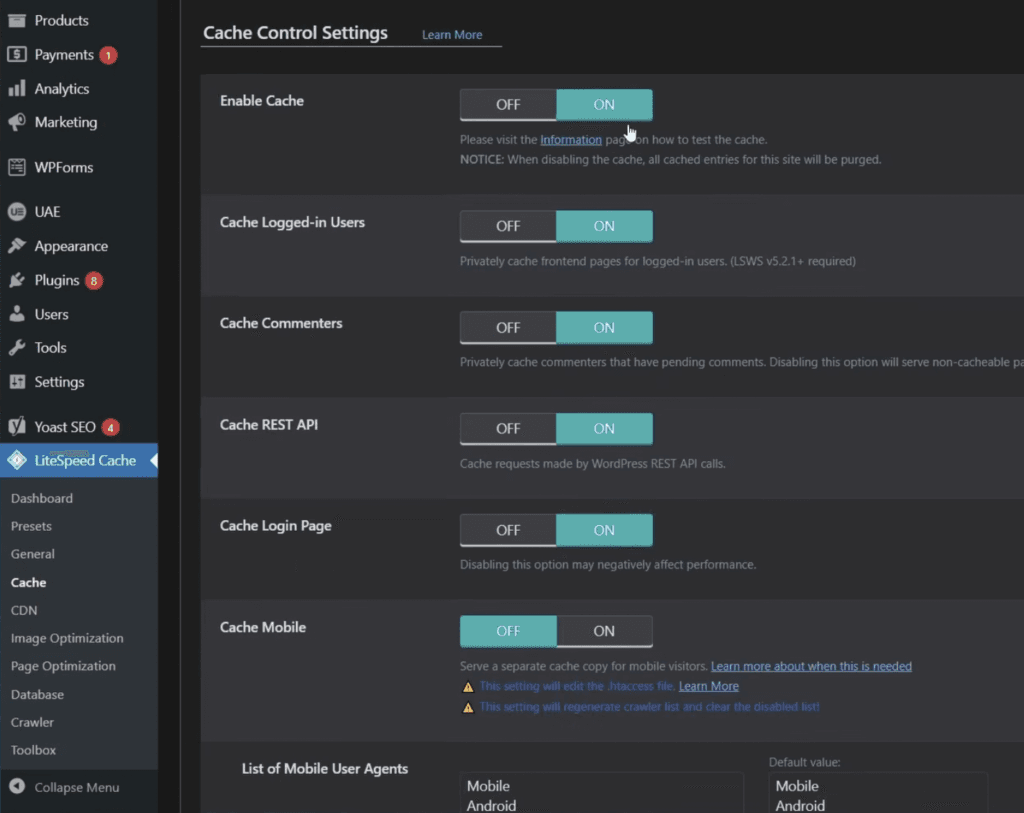
Open LiteSpeed Cache → Cache. Set Enable Cache to ON — that’s the one that matters most. Then turn on Cache REST API (used by the block editor and many themes) and Cache Login Page. Click Save Changes. You can leave the rest of this tab on its defaults for now.
Step 3 — Apply a preset and browser cache
Rather than flipping dozens of options by hand, open the Presets tab and apply a starter preset (Basic or Standard is safe for most sites). Then, back in the Cache tab, make sure Browser Cache is ON so returning visitors load static files from their own browser instead of re-downloading them. Presets are the beginner-safe way to get most of the speed without breaking anything.
Step 4 — Purge all and confirm it’s caching
Go to LiteSpeed Cache → Toolbox → Purge All so the plugin rebuilds fresh cached copies. Then open your site in an incognito window and reload a page twice — the second load should feel instant. To be sure, open your browser’s developer tools, reload, and look for an x-litespeed-cache: hit response header on the page request.
Finish the job: images, database, and plugin bloat
Caching is the biggest lever, but three quick extras from the video round out your speed setup.
Compress your images with Smush. Install the Smush plugin, then run Bulk Smush — it compresses every existing image in your media library in one pass, with nothing to configure.
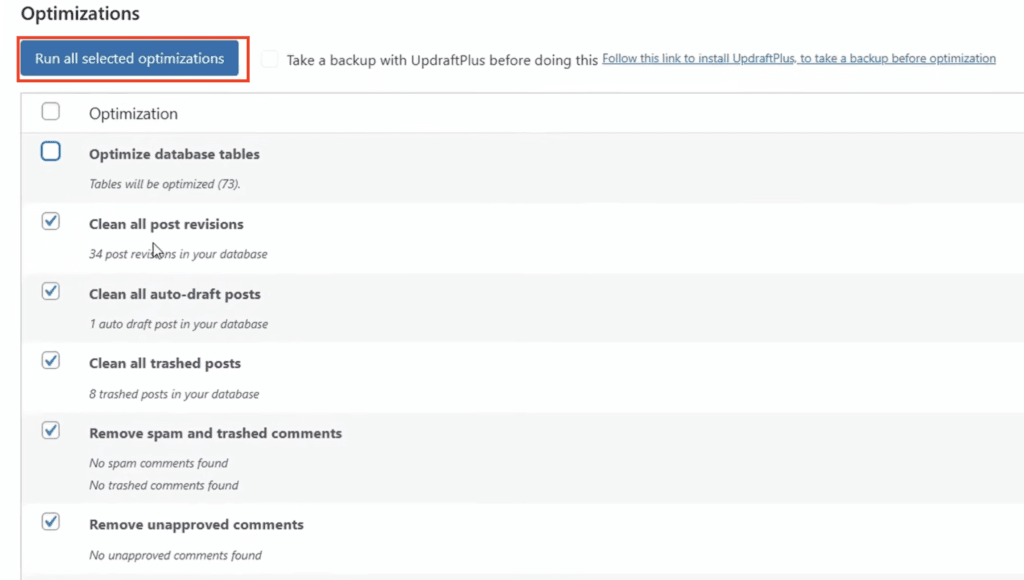
Clean your database with WP-Optimize. Install WP-Optimize, open its Optimize screen, tick the clean-up options plus “remove spam and trashed comments”, and run all selected optimizations. It clears revisions and junk that quietly bloat your database.
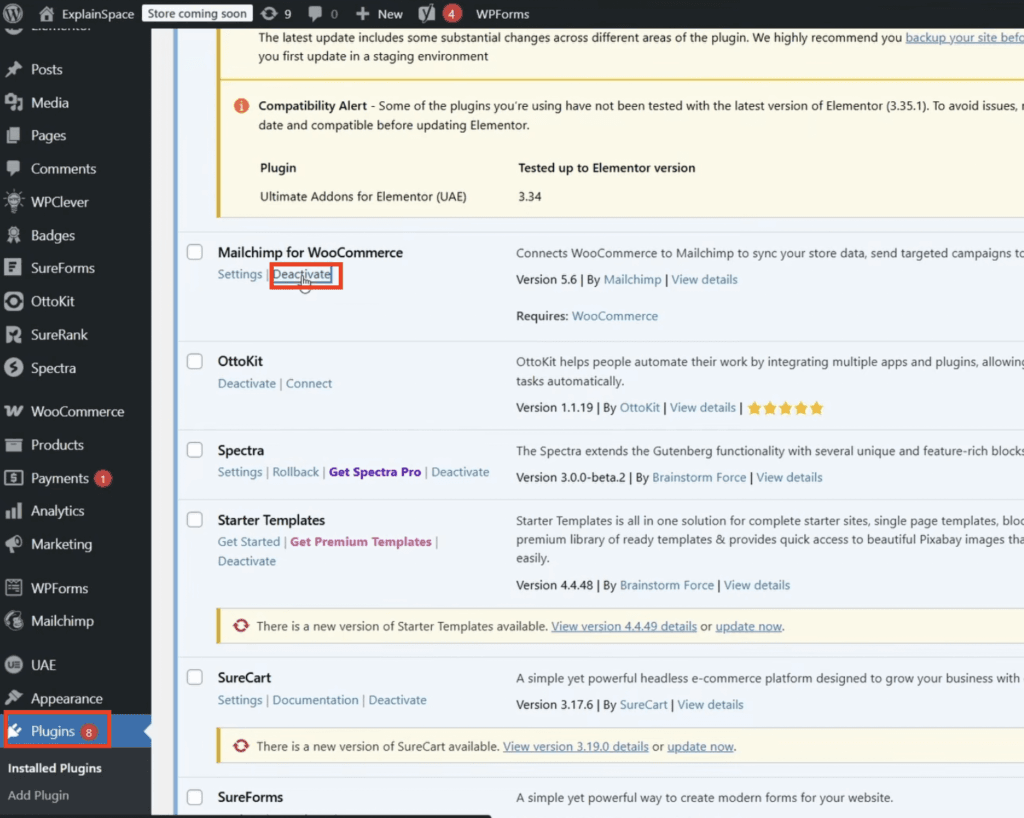
Delete plugins you don’t use. Go to Plugins → Installed Plugins, deactivate anything you’re not actively using, then delete it. Every active plugin loads its own code on your pages, so unused ones slow the site for no reason.
If your site looks broken after enabling optimization
If your layout breaks, it’s almost never the cache — it’s the page-optimization settings. Work through these:
- Turn off CSS Combine, JS Combine, and Generate Critical CSS first — these cause most layout issues.
- Purge all (Toolbox → Purge All) and reload in an incognito window to see the real result.
- If one element breaks, exclude that specific script or stylesheet instead of disabling everything.
- Re-enable options one at a time, testing after each, so you know exactly which one caused it.
- Never run two caching plugins at once — remove any others before LiteSpeed Cache.
What actually moved the needle for me
I kept this simple to start. In the Cache tab I switched on Enable Cache, Cache REST API, and Cache Login Page — the three you can see in the screenshot — saved, and purged once. That alone took my load time from about 2.1s to 1.5s. Where I got greedy was the page-optimization tab: I turned on CSS and JS Combine and my header instantly went sideways. The fix was easy — turned those two back off, purged, and it was fine. So my advice for a beginner: get the basic cache working first, confirm it, then add one optimization toggle at a time. Don’t flip them all at once or you won’t know what broke.
Get the Hostinger deal
LiteSpeed Cache only reaches full power on a LiteSpeed server. Hostinger runs LiteSpeed, pre-installs the plugin, and throws in a free domain — currently up to 79% off. The easiest way to get the server-level caching this guide is built around.
Do you still need a caching plugin on fast hosting?
Yes — even good hosting benefits from a caching plugin, because the plugin controls how pages are cached and optimised, not just whether they are. The difference is that on a LiteSpeed host the plugin and the server work together for true server-level caching, while on slow, overcrowded shared hosting no plugin fully makes up for the server. If your site still feels sluggish after setting LiteSpeed Cache up properly, the hosting is usually the bottleneck — not the plugin.
Server-level caching, the way LiteSpeed Cache is meant to run
Launch WordPress on Hostinger’s LiteSpeed servers with the plugin pre-installed and a free domain.
Frequently asked questions
Does LiteSpeed Cache work without a LiteSpeed server?
Partly. The full-page caching that gives the biggest speed boost needs a LiteSpeed web server. On Apache or Nginx the plugin still does front-end optimization — CSS and JS minification, lazy loading, browser cache — and you can add LiteSpeed’s free QUIC.cloud service for cloud caching. For the full benefit, host on a LiteSpeed server; Hostinger runs LiteSpeed and pre-installs the plugin.
What are the most important LiteSpeed Cache settings to turn on?
Start with Enable Cache, Cache REST API, and Cache Login Page in the Cache tab, plus Browser Cache. Then apply a starter Preset rather than flipping every toggle by hand. The CSS and JS optimization options give extra speed but can break layouts, so add those carefully and test in an incognito window.
Is LiteSpeed Cache free?
Yes, the plugin is completely free. Some cloud-powered extras — image optimization, Critical CSS, and the QUIC.cloud CDN — run on a freemium model, with a free tier and paid plans if you need more.
LiteSpeed Cache broke my site’s layout — how do I fix it?
It’s almost always the page-optimization settings, not the cache itself. Turn off CSS/JS Combine and Critical CSS, purge all, and reload in an incognito window. If one element breaks, exclude that specific script or stylesheet instead of disabling everything. Re-enable options one at a time so you know which caused it.
Do I still need Smush or WP-Optimize if I have LiteSpeed Cache?
Not necessarily. LiteSpeed Cache can optimize images through QUIC.cloud and clean your database from its own Toolbox. Standalone tools like Smush and WP-Optimize are simple alternatives if you’d rather handle images and database cleanup separately, which is what the video shows.
Related next step
Next: read more WordPress guides, compare platforms in Shopify vs WordPress, or check the current hosting deals.