To create and sell an online course in GoHighLevel, go to Memberships → Courses, create the course with a title, thumbnail and price, build it out of modules and lessons, connect a payment processor such as Stripe, and send buyers to the offer checkout or a funnel. Students then get access through the client portal. Here is every step. Through our link you get a 30-day free trial instead of 14 days to build the course before you pay.
GoHighLevel deal
Extended 30-day free trial (the standard is 14 days), plus the free GHL Launch Vault (20 bonuses, including a client-ready sales kit).
Step 1: Create the course
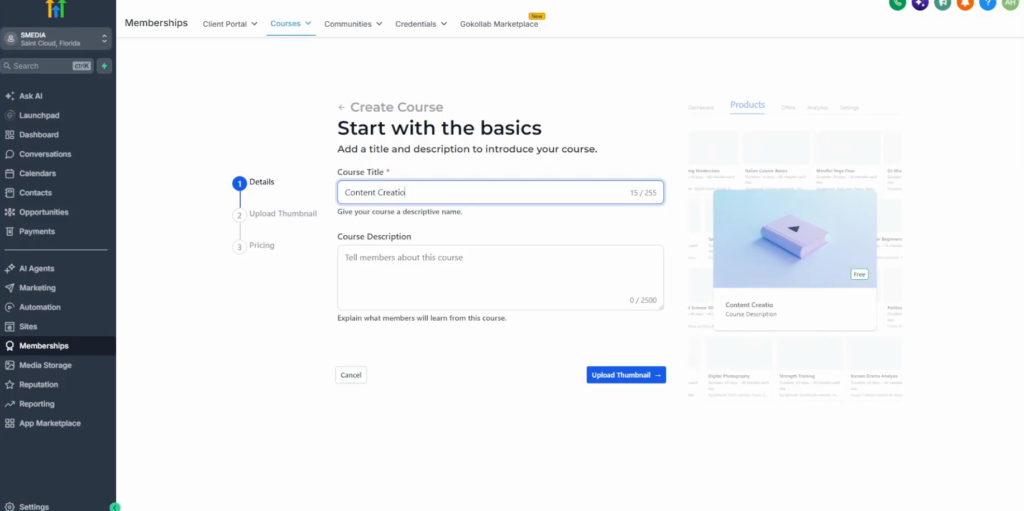
In the left menu click Memberships, open the Courses tab and click Create a course. Enter a title (for example Content Creation for Beginners), an optional description, and upload a thumbnail.
Step 2: Set the price
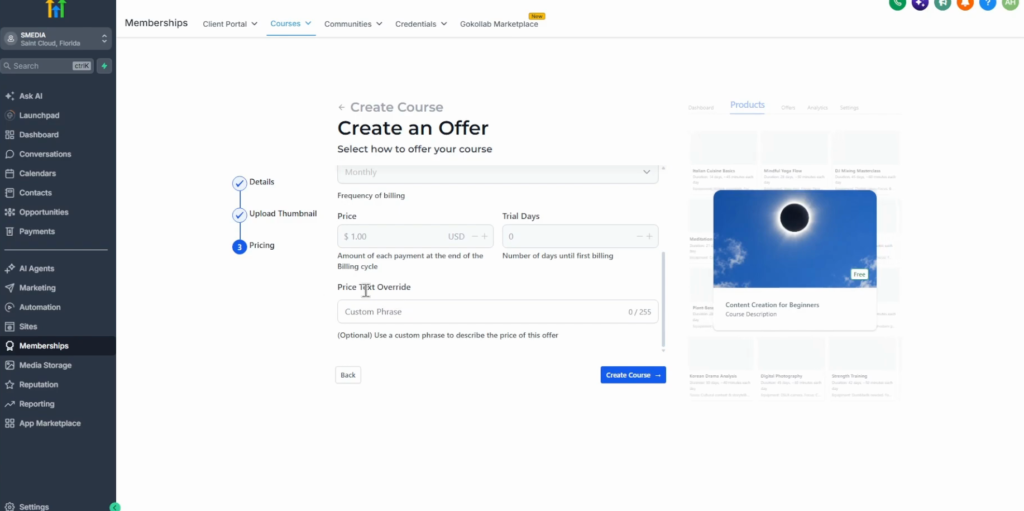
Next comes the offer. Choose the pricing plan: Free, One-time payment or Recurring (then pick weekly, monthly or yearly billing). Enter the price and, if you want, trial days so buyers can try it before paying (0 means no trial). The price text override is an optional custom phrase for how the price is shown. Click Create course.
Step 3: Build the structure: modules and lessons
A good course is split into modules (categories) with lessons inside each one. GoHighLevel starts you with placeholders: Module 1, a Welcome Badge, Course Contents with sample lessons, and a Course Completion Credential. Edit them or delete them and add your own.
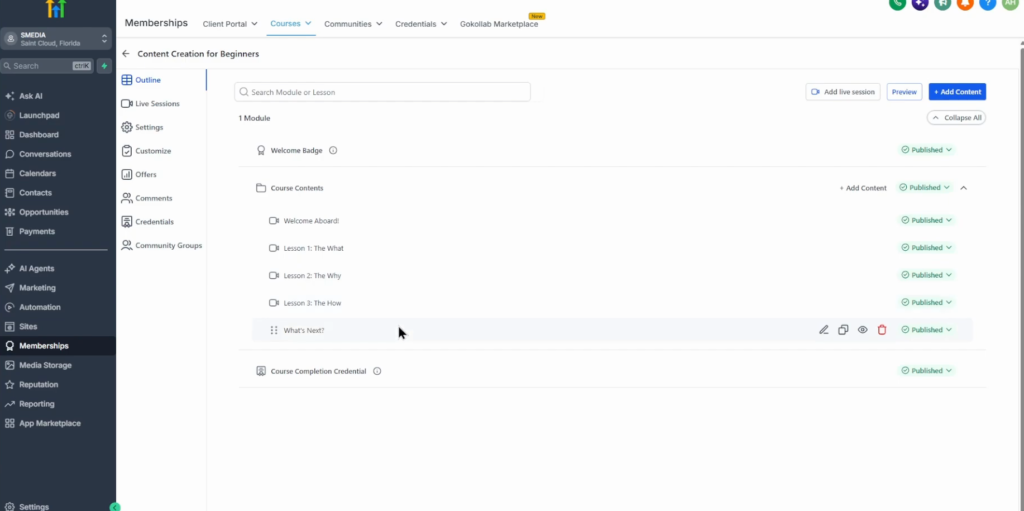
Click Add content to add modules, sub-modules, lessons, quizzes and assignments, or import content from another course. There is only one welcome badge and one completion credential per course, so edit those rather than adding new ones.
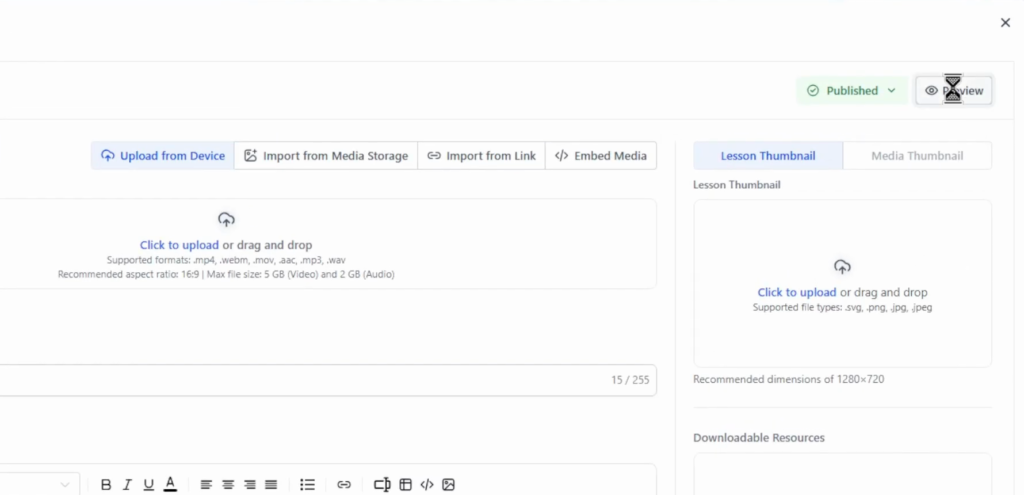
For each lesson, upload a video, import from media storage or a link, or embed media. Add the lesson name, description, a lesson thumbnail and media thumbnail, and any downloadable resources. Use Preview at the top right to see the lesson, or the whole course, the way buyers will.
Step 4: Add live sessions (optional)
You can include live sessions in the course or the offer. Schedule the date (and be there), or cancel later if needed. The Sessions area in the course menu lists sessions and recordings.
Step 5: Choose a theme
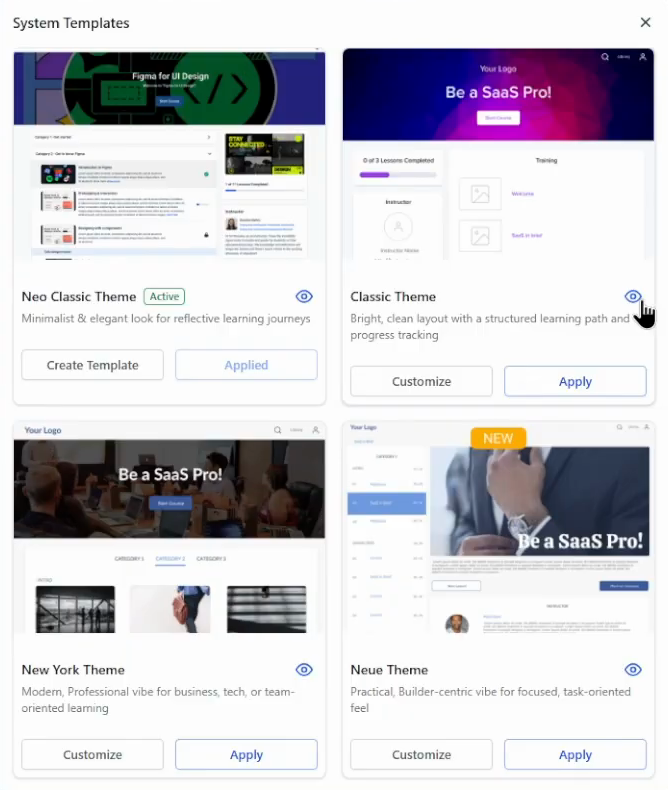
In the course Settings you can edit the title, description and thumbnails. Under Customize, edit the current theme or click Browse templates, preview a theme and click Apply.
Step 6: Set up offers and upsells
The course will not sell itself. Open Offers: the offer you created in step 2 is there, and you can edit its details. You can create several offers for the same course, for example $5 a month recurring and a $40 one-time payment, and add upsells (a standard upsell or a one-click upsell) for related products. Upsell products come from Payments → Products.
Step 7: Connect a payment processor
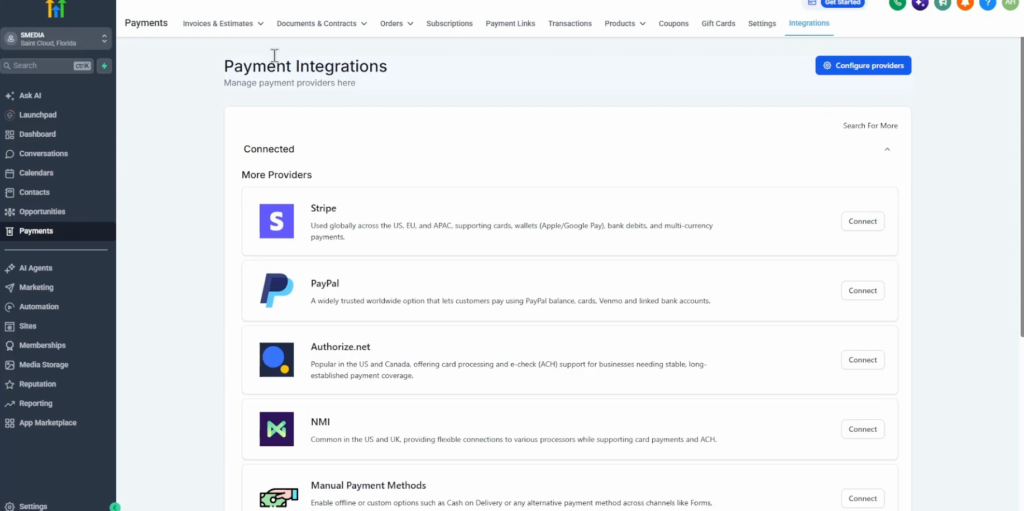
You cannot charge for a course until a payment processor is connected; without one you can only offer it for free. Go to Payments → Integrations and connect Stripe, PayPal, Authorize.net, NMI or another supported provider.
Step 8: Give buyers a checkout
Inside each paid offer, click Edit checkout to customize the checkout page and preview it (free offers have no checkout). You can send buyers straight to the offer link, or build a custom sales page in a GoHighLevel funnel or website and place the checkout there.
Step 9: Check the student side
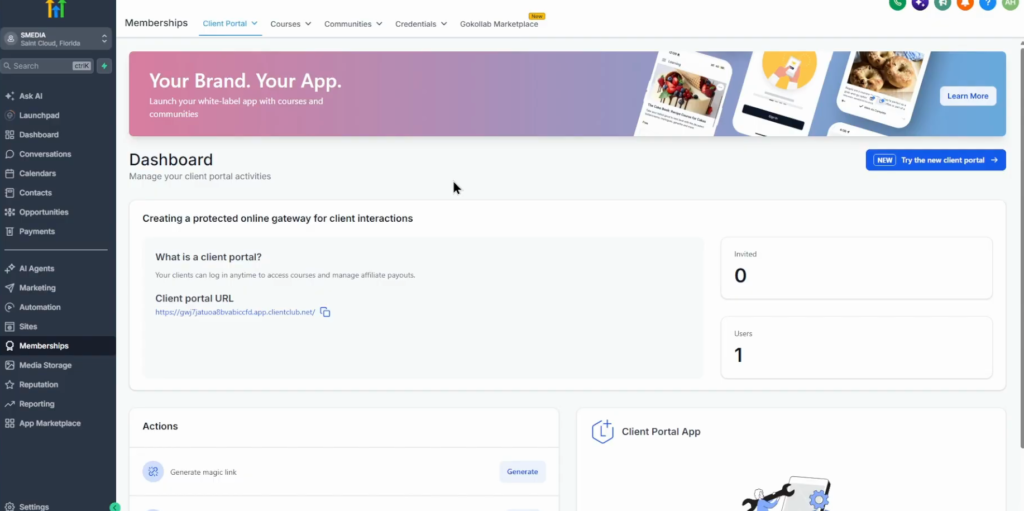
Students access their courses through the client portal, signing in with their customer account. From the portal actions you can generate a magic link, invite someone to the client portal or send a login email, and you can preview both the classic and the new client portal.
After purchase, buyers get access to the modules in their offer. From there you can keep adding lessons, create more offers, or bundle several courses together.
How I would launch a first course
Start with one offer and a short course: three to five modules you can record in a weekend. Add a free trial period if your audience does not know you yet, and a one-time price that is easy to say yes to.
Build the sales page in a funnel rather than sending people to a bare checkout, and test the whole path as a buyer, including the client portal login, before you announce it.
Common mistakes
- No payment processor connected, so the course can only be free.
- Leaving the placeholder lessons (Welcome Aboard and sample lessons) in the published course.
- Skipping the preview of lessons and the full course.
- Not testing the client portal login and magic link before launch.
- One offer only, when a recurring and a one-time option could serve two kinds of buyers.
Create your course on a 30-day GoHighLevel trial
30 days free instead of 14, plus the free GHL Launch Vault: 20 bonuses including a client-ready sales kit.
FAQ
Can you sell courses on GoHighLevel?
Yes. Create the course under Memberships, set a free, one-time or recurring price, connect a payment processor such as Stripe or PayPal, and sell through the offer checkout or a funnel.
Where are courses in GoHighLevel?
In the left menu under Memberships, on the Courses tab.
Do I need Stripe to sell a course in GoHighLevel?
You need a connected payment processor. Stripe is the most common, and PayPal, Authorize.net, NMI and others are supported. Without one you can only offer the course for free.
Can I offer a free trial on a GoHighLevel course?
Yes. Set trial days on the offer so buyers can try the course before their first payment; 0 means no trial.
How do students access a GoHighLevel course?
Through the client portal, with their customer account. You can also send a magic link, an invite or a login email.
Can I add upsells to a course?
Yes. In the offer, add a standard or one-click upsell using products from Payments → Products.
Related next step
Build the sales page with our guide to creating a funnel in GoHighLevel, see how a course fits a team setup in CRM for network marketing, and brand the platform with the white label setup.